
Three Days to a New Look
Guess what happens when your husband watches too many HGTV shows? We have been binge watching some old seasons of our favorites, Nicole Curtis of Rehab Addict, plus Ben and Erin of Home Town.
We were innocently sitting in our kitchen the other night, and Steve just happened to look at our brown painted cabinets. They had gone through many, many years of abuse with renter's moving in and out and multiple coats of paint. They have a lot of battle scars to show it.
Here is how they looked in 2015:
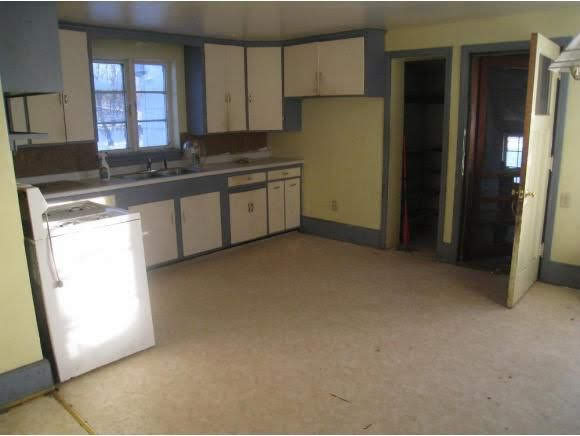

They were all painted with a deep rich brown paint and new stainless steel handles, pulls and hinges were added. Not to mention a center Island was added and new counter-tops. It looked really nice. We added the open pantry and the french door since we bought the house. But it was dark, I must admit.
Steve was intently looking at the dark cabinets, he suggested: what do you think if we painted them white? Now I would NEVER paint nice wooden stained and varnished cabinets. NO way. That is blasphemy!~ But these are rugged painted 100+ year old cabinets of a common farmhouse style.
If you've been reading my blog for any amount of time, you would realize that Steve does not like to paint. If he can avoid it at all possible he will. So that means... It was up to little old Me!
The more we looked at it, and the more we thought about it, it seemed like an interesting idea. So I grabbed a bundle of blank newsprint paper, and we taped sections of it up over the existing brown cabinet doors just to give us a visualization of what it might look like.

Of course, this was at 9 p.m. at night. So we really couldn't get a good idea until the next morning. We agreed to sleep on it and left it at that.

The next morning we looked at the pieces of creamy white paper taped up and thought the kitchen looked brighter. Even though it was a gloomy cloudy day, the brighter surfaces of the taped up paper seem to give us an idea of what it would look like if we brightened up the kitchen.
I happened to have 2/3 of a gallon of the existing trim paint that matched the trim in the kitchen and the trim in the rest of the house. It's a soft creamy white called String of Pearls from Valspar. It's a nice thick coating semi-gloss paint and I figured two coats would be needed to cover all of the dark brown cabinets.
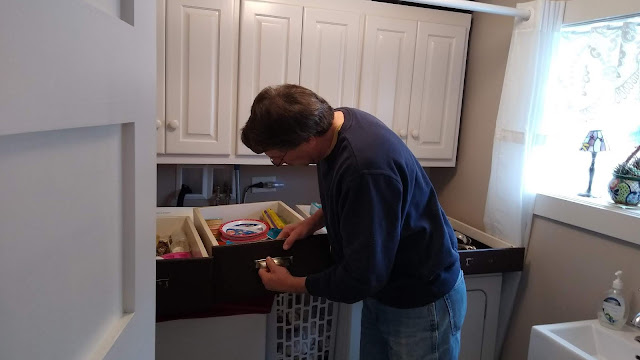
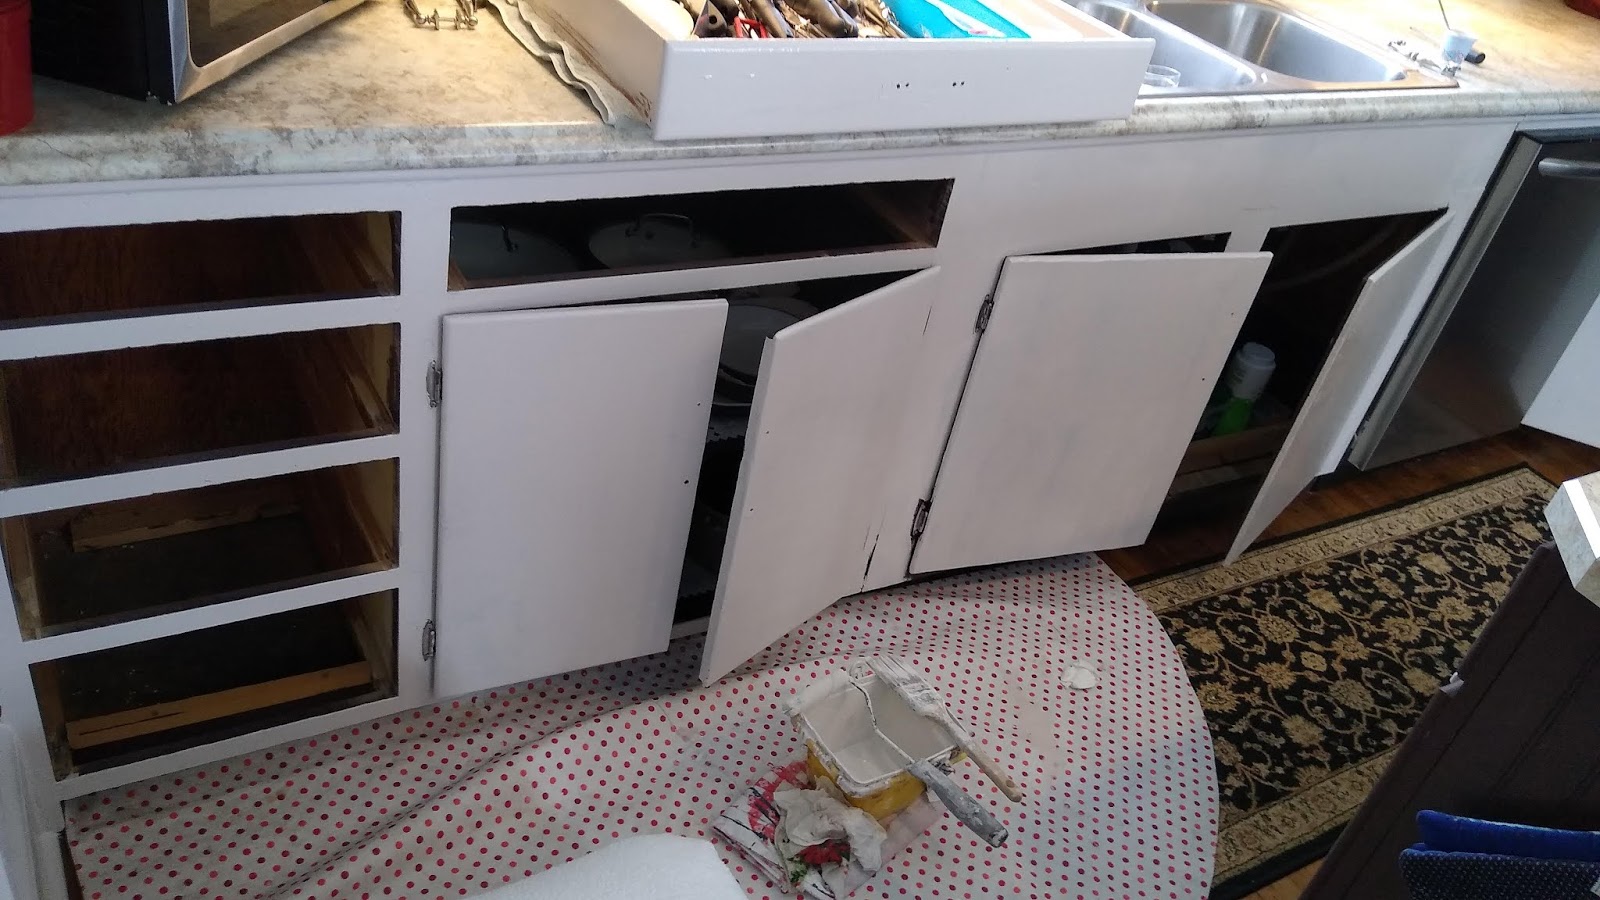
I got out all of my painting gear, and Steve helped by removing all of the handles and pulls as well as stacking the drawers in the laundry room so I could paint their faces without having them still sitting within the cabinetry itself.

I decided to leave the doors on and paint carefully around the hinges. Normally, I would have taken the doors off and laid them flat on saw horses. But since it's winter outside and the garage is cold, there's no real place to paint these doors laying flat. I decided to paint them in the upright position still hanging on their hinges. Later I would carefully unscrew each hinge, one at a time, clean up any little boo boos, and paint the surface around the hinge that might be missed by my smallish paintbrush. Then screw it back into place without ever having to remove the door.
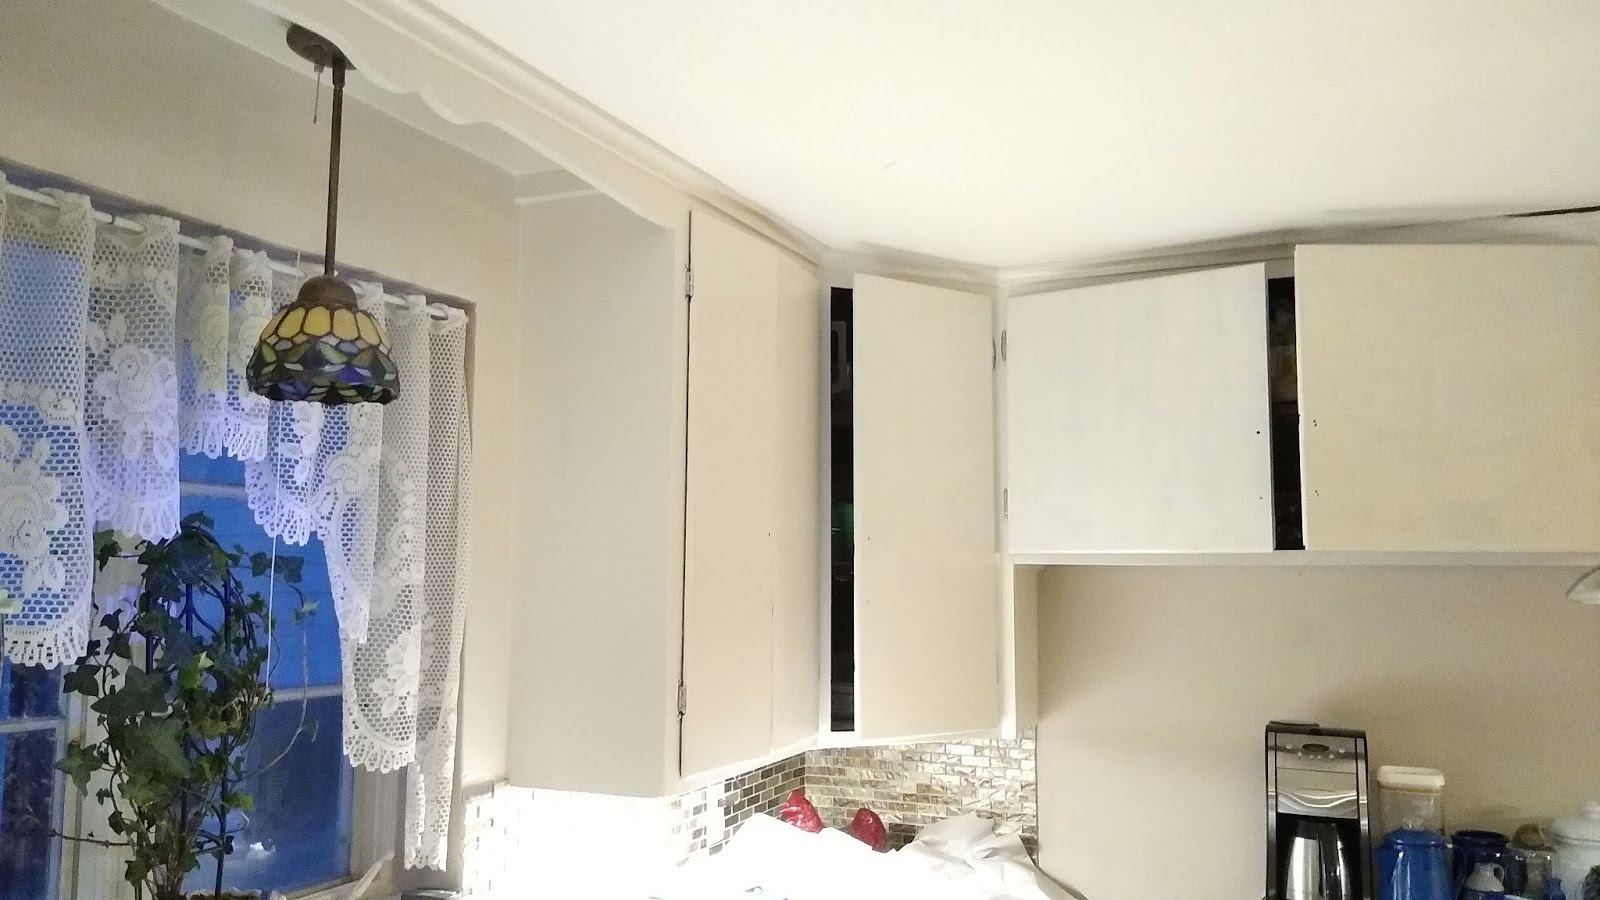
I decided not to paint the insides of the cabinets because they had all been recently done and were in good shape. Who cares if the insides are brown? They are neat and clean and nobody sees the insides except us!

The painting went really well and I worked my way across the uppers. I figured I would tackle the hard stuff first. Steve was one step ahead of me with his caulk gun filling in any little holes or cracks that would show once the cabinets were lighter. When they were dark brown we didn't notice a lot of that.
~~~~~~~~
I happened to have 2/3 of a gallon of the existing trim paint that matched the trim in the kitchen and the trim in the rest of the house. It's a soft creamy white called String of Pearls from Valspar. It's a nice thick coating semi-gloss paint and I figured two coats would be needed to cover all of the dark brown cabinets.
I got out all of my painting gear, and Steve helped by removing all of the handles and pulls as well as stacking the drawers in the laundry room so I could paint their faces without having them still sitting within the cabinetry itself.


I decided to leave the doors on and paint carefully around the hinges. Normally, I would have taken the doors off and laid them flat on saw horses. But since it's winter outside and the garage is cold, there's no real place to paint these doors laying flat. I decided to paint them in the upright position still hanging on their hinges. Later I would carefully unscrew each hinge, one at a time, clean up any little boo boos, and paint the surface around the hinge that might be missed by my smallish paintbrush. Then screw it back into place without ever having to remove the door.
I decided not to paint the insides of the cabinets because they had all been recently done and were in good shape. Who cares if the insides are brown? They are neat and clean and nobody sees the insides except us!
The painting went really well and I worked my way across the uppers. I figured I would tackle the hard stuff first. Steve was one step ahead of me with his caulk gun filling in any little holes or cracks that would show once the cabinets were lighter. When they were dark brown we didn't notice a lot of that.

By later afternoon I was able to finish the rest of the upper cabinets with two complete coats. My back was aching and my feet were sore from balancing on the little step stool all day. I decided enough was enough for the day and I would tackle the next part after a long soak in my tub and a good night sleep.
~~~~~~~~
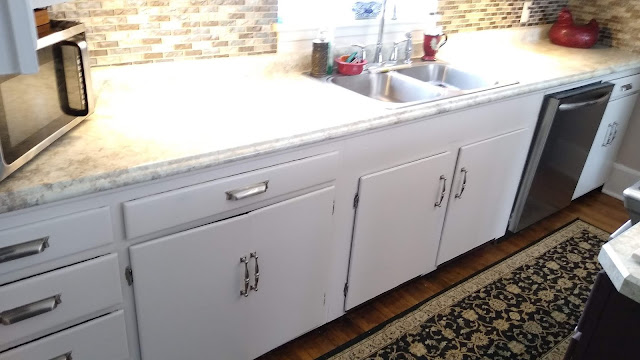
The next morning, it was time to tackle the lower cabinets. Again, Steve was ahead of me with the caulking gun filling in any of the cracks and I worked my way across while sitting on a little ottoman covered with a towel. This was sit-down work! It went much easier than up and down up and down the step ladder of the day before.
I was able to work my way across the entire span of lower cabinets and give two coats to everything. A few areas needed a little more attention, and those got a third coat once we were done.

Again, that was enough for the day. Now that we are retired, I don't need to be working so hard, do I?
~~~~~~~~
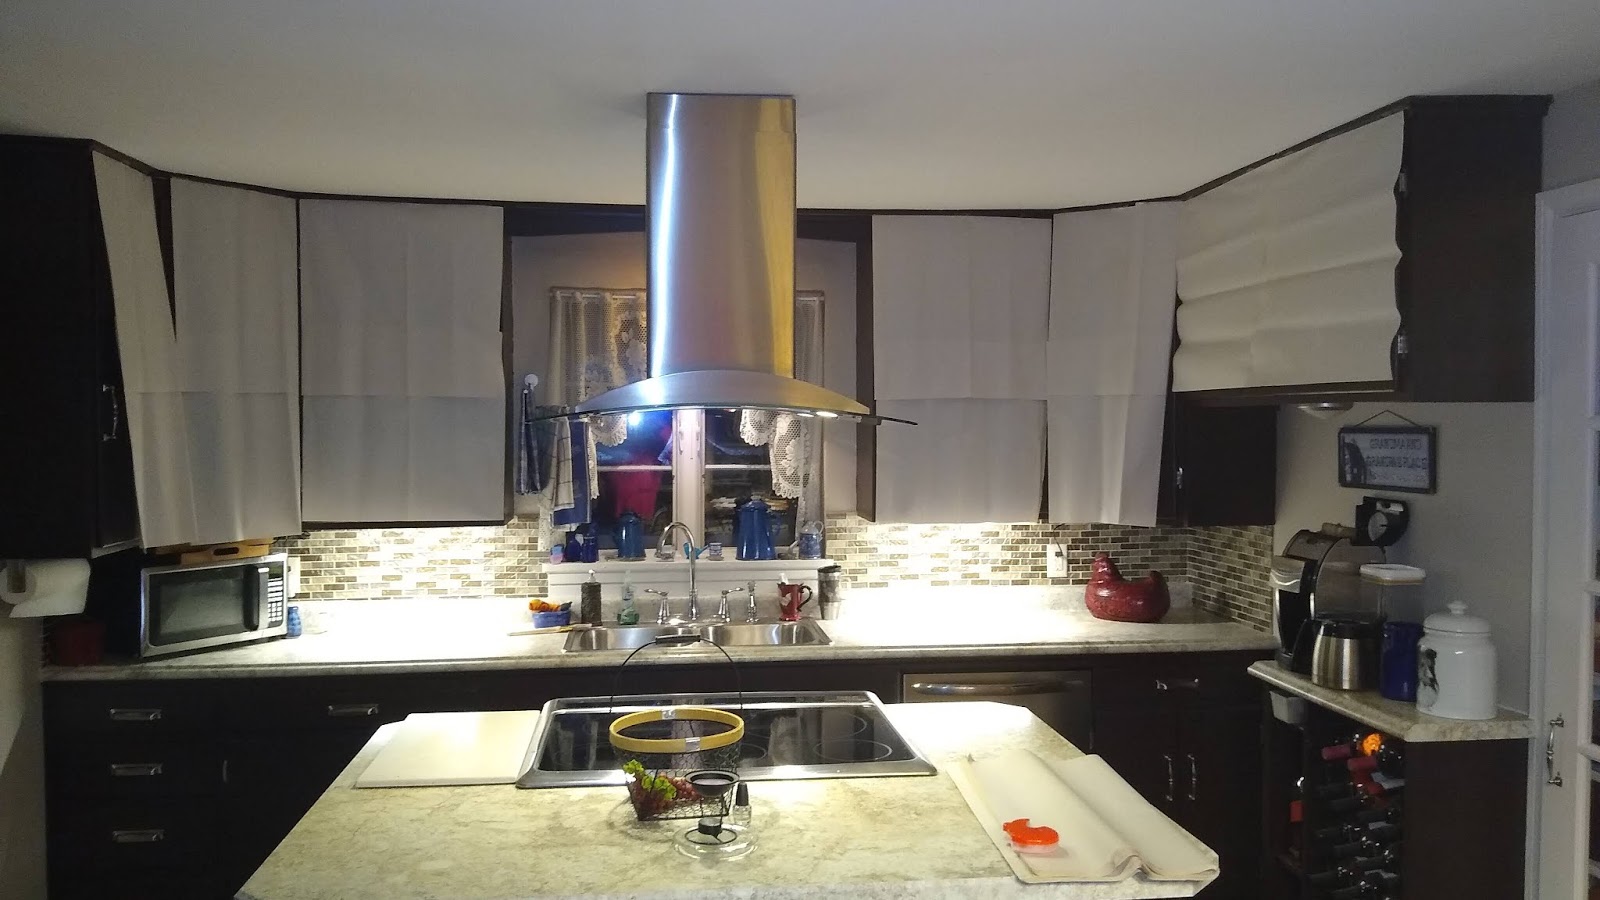
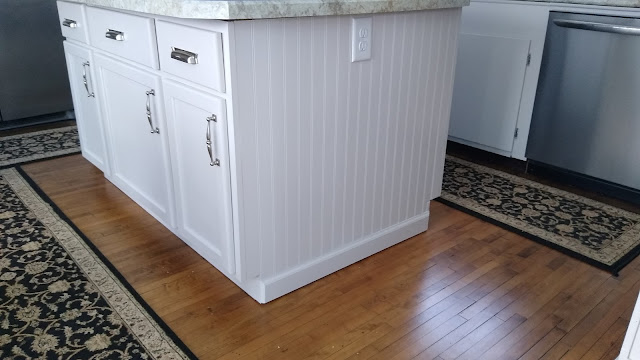
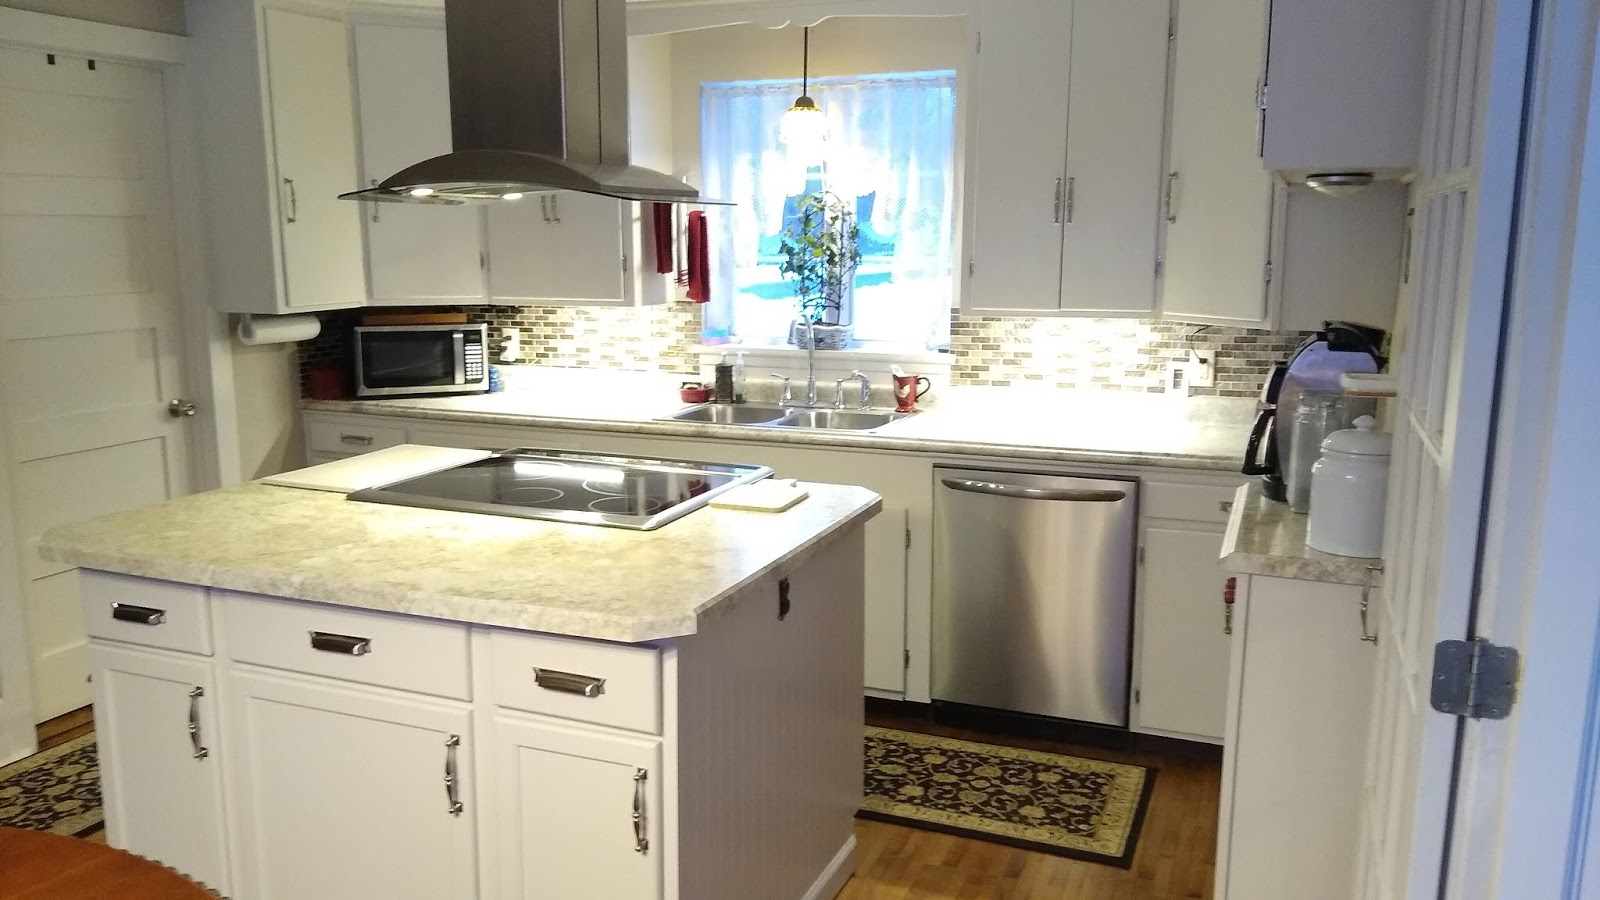
The very last day it was time to attack the island and the coffee bar. The island is newer cabinetry that was put in by the previous owners to surround the new larger stove and the suspended hood vent.

~~~~~~~~

On one side we have pull out bins for the trash and recycling, and on the other side it is all cabinet doors and drawers. The hinges were different on this unit, they are recessed and hidden. So the painting went very easy.

The beadboard sides of the island really show up now, don't you think? When they were brown you really didn't notice them.
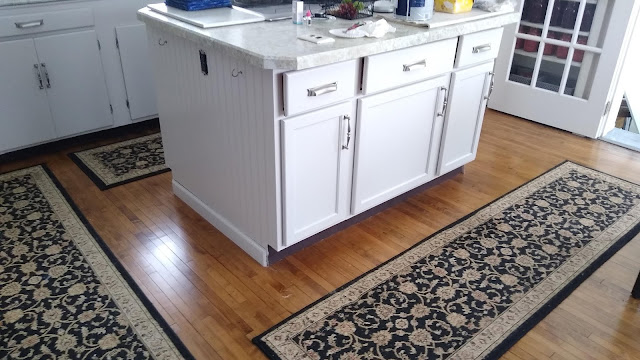
I think we are going to buy a 4x8 sheet of beadboard and cut out side panels for the ends of the cabinets and the coffee bar to tie it all together. More "Farmhouse-y". Maybe even insert some panels on the three lower cabinet doors of the island as well.
Steve changed the baseboard on each side to a prettier trim that is the same that we use down in the she shed.
Next Steve had to change the 2 island electrical outlets from brown to white. Two coats of paint went quickly and I decided to go back and also paint the toe kick white. That may be a mistake in the future, but if it gets grubby looking, I can always give it a fresh coat of paint.
Also on the last day, I my tackled was my adorable little coffee bar / wine rack that we recently built. We re-purposed an extra piece of cabinetry left over from the other side of the kitchen that had originally gone over a stove on the wall. Since the stove was relocated to the center of the island, that piece of cabinetry was not needed.

I think we are going to buy a 4x8 sheet of beadboard and cut out side panels for the ends of the cabinets and the coffee bar to tie it all together. More "Farmhouse-y". Maybe even insert some panels on the three lower cabinet doors of the island as well.
Steve changed the baseboard on each side to a prettier trim that is the same that we use down in the she shed.
Next Steve had to change the 2 island electrical outlets from brown to white. Two coats of paint went quickly and I decided to go back and also paint the toe kick white. That may be a mistake in the future, but if it gets grubby looking, I can always give it a fresh coat of paint.


I love to re-purpose and recycle things, so by turning it vertical, it made a wonderful addition to our kitchen right next to our open pantry shelving. There had originally been a space here for a refrigerator and that piece of cabinetry overhead was kind of awkward with just a blank wall underneath it.
By adding the coffee bar / wine rack, it really filled in that space and made the kitchen all come together. I decided not to paint the interior of the wine rack area because that tends to collect dust and I think leaving at dark helps hide it. (plus I didn't want to remove all those bottles!)
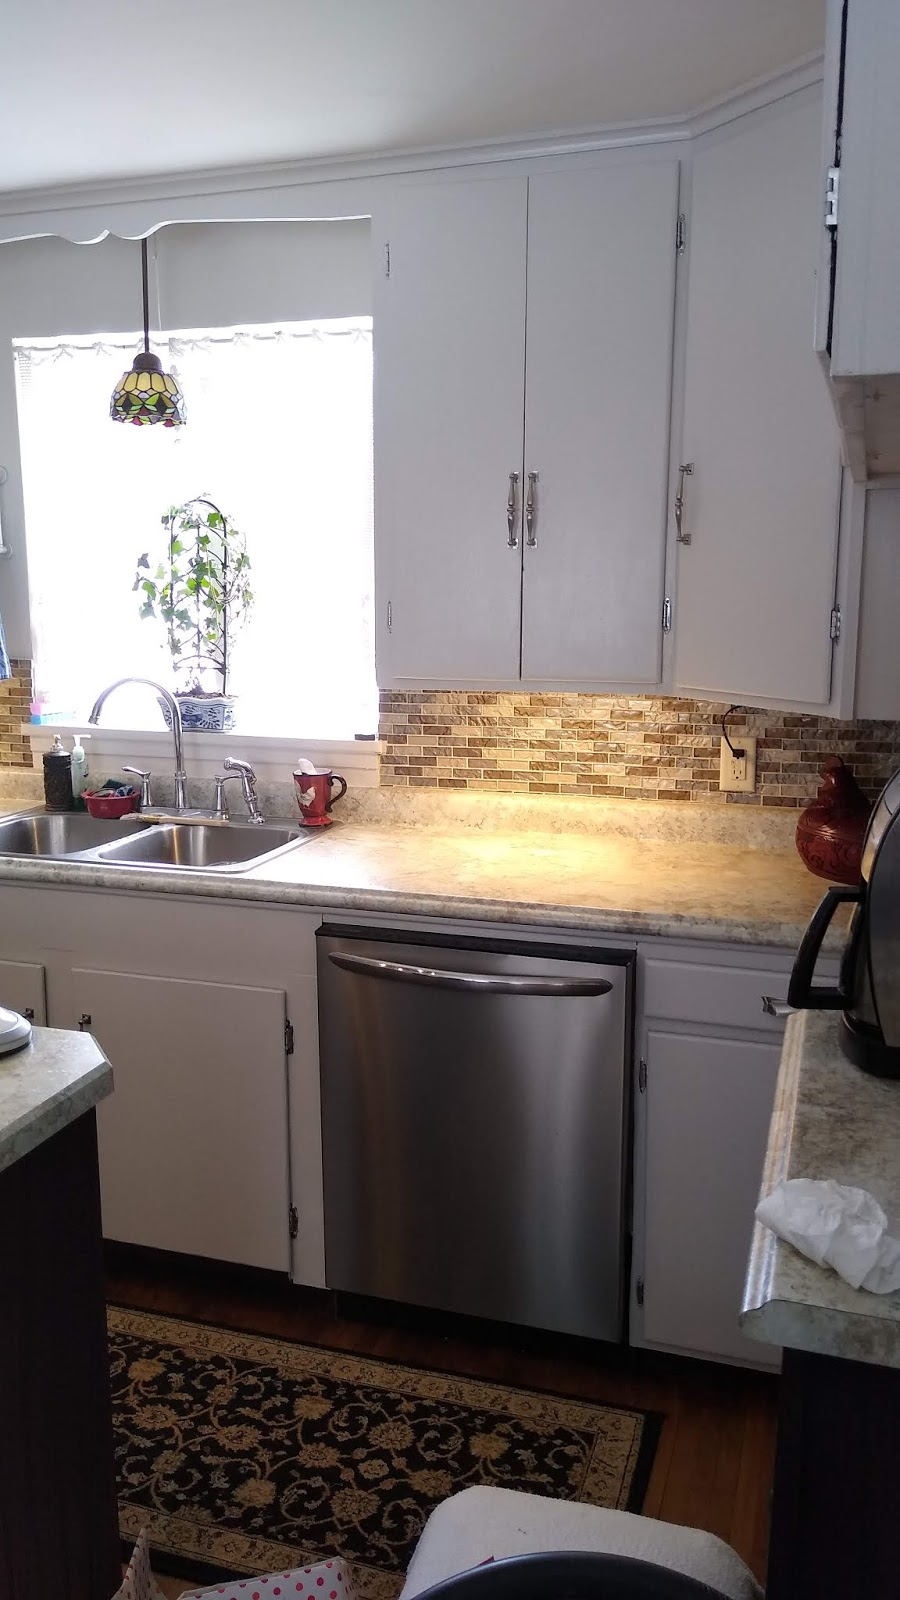
I stood back and admired the work. In just three days it seemed like the whole kitchen had been transformed. Steve helped me put the drawers back after things had dried and he attached all of the handles and drawer pulls into place.

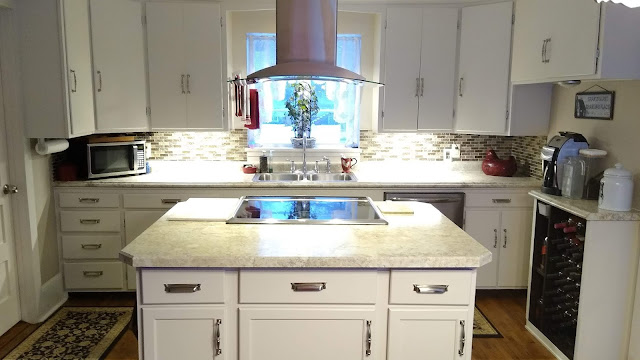
It has been 3 very cloudy dull dreary days, but this really brightened up the kitchen. I am anxious to see what it looks like on a sunshiny day!
There hasn't been a lot of other things happening. We are kind of hibernating in for the winter. I am working on a new quilt.
Since we haven't been doing any RVing, I decided I'm going to start posting blogs every day of our motorhome modifications. I start with A and go through till Z. I've done this twice in the past and I feel they are things that may be of more interest to my RVing readers. Recently, with the demise of the Yahoo groups, our Safari people have kind of meandered over to an IO list and some of the Facebook groups. Maybe by posting these blogs with my A to Z motorhome modifications, I will attract some of them back to reading the blog again.
Even though we're not traveling anywhere this winter, we still exercise the motorhome generator monthly. It's good to fire it up and get a load on it. We learned the hard way that if you don't use it, things go bad. At one point because we weren't using it enough, we had to remove it, have the electrical windings called the rotor rebuilt, and reinstall it. That will be one of my motor home modification posts. It was not a fun job. I guess when things sit for too long they don't work so well. By firing up the generator (and also the engine and letting it idle for a while), things get lubed up, used, charged up and exercised. We do have solar panels on the roof that keep the batteries charged, and Steve regularly goes out and brushes off the snow.
Now that we are done with the She Shed and a lot of the major house projects, we are looking forward to getting more camping and trips this summer. So stay tuned!
My oh my! What a difference!

~~~~~~~~
Since we haven't been doing any RVing, I decided I'm going to start posting blogs every day of our motorhome modifications. I start with A and go through till Z. I've done this twice in the past and I feel they are things that may be of more interest to my RVing readers. Recently, with the demise of the Yahoo groups, our Safari people have kind of meandered over to an IO list and some of the Facebook groups. Maybe by posting these blogs with my A to Z motorhome modifications, I will attract some of them back to reading the blog again.
Even though we're not traveling anywhere this winter, we still exercise the motorhome generator monthly. It's good to fire it up and get a load on it. We learned the hard way that if you don't use it, things go bad. At one point because we weren't using it enough, we had to remove it, have the electrical windings called the rotor rebuilt, and reinstall it. That will be one of my motor home modification posts. It was not a fun job. I guess when things sit for too long they don't work so well. By firing up the generator (and also the engine and letting it idle for a while), things get lubed up, used, charged up and exercised. We do have solar panels on the roof that keep the batteries charged, and Steve regularly goes out and brushes off the snow.
Now that we are done with the She Shed and a lot of the major house projects, we are looking forward to getting more camping and trips this summer. So stay tuned!